

In this Photo Effects tutorial, we'll learn how to turn any image into a collage of polaroids. In other words, we'll create what looks like a bunch of polaroid photos spread out randomly on the background, yet within each polaroid is a small section of your larger overall image. It may look complicated at first, but as we'll see, it's actually a very easy effect to create in Photoshop, especially since much of the work is just simple repetition.
This version of the tutorial has been completely re-written and updated from the original and is now fully compatible with both Photoshop CS6 and Photoshop CC (Creative Cloud). It also features a slightly different way of creating the effect (compared with the way I covered in the original version), this time taking advantage of Photoshop's shape layers as well as a little-known but very powerful feature found in Photoshop's Advanced Blending options. Don't let the "Advanced" part fool you, though. Anyone can do this, and as always, I'll be covering every step along the way.
As I mentioned, you'll need Photoshop CS6 or CC to follow along. If you're using Photoshop CS5 or earlier, you'll want to check out our original Turn A Photo Into A Collage Of Polaroids tutorial.
Here's the image I'll be using (mom and daughter vacation photo from Shutterstock):

And here's what the final "collage of polaroids" effect will look like:

Let's get started!
Step 1: Select The Rectangle Tool
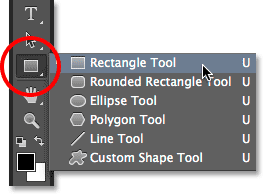
With our image newly opened in Photoshop, let's begin our polaroid collage effect by creating our first polaroid. To create it, we'll use one of Photoshop's shape tools - the Rectangle Tool. Click on its icon in the lower half of the Tools panel to select it. If a different shape tool is visible in its place, click and hold on the tool to bring up the fly-out menu, then select the Rectangle Tool from the list:
Step 2: Set The Tool Mode To Shape
Photoshop's shape tools let us draw vector shapes, paths or pixel-based shapes. We want to draw our polaroid using vector shapes, which will not only keep the edges nice and sharp but will also keep our overall file size from getting out of hand as we add more and more polaroids to the collage. To set the Rectangle Tool to draw vector shapes, set the Tool Mode option on the far left of the Options Bar to Shape:

Step 3: Set The Fill Color To Black And The Stroke To None
Let's set the color of our rectangle shape to black, since this shape will be used as the area in the center of the polaroid where the photo appears. It actually doesn't matter what color we use for this shape. Black is just easy to see in front of our image. To set its color to black, click on the Fill color swatch up in the Options Bar. You may notice that mine is already set to black, but that's okay:

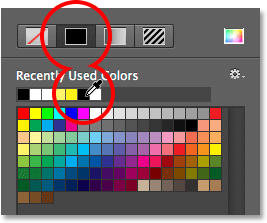
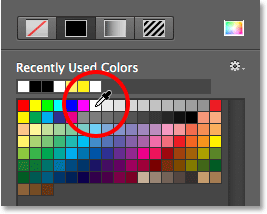
Clicking the color swatch opens the Fill Type dialog box where we choose the type of fill we want for the shape. There's four different fill types to choose from, and we switch between them using the four icons displayed in a row in the upper left of the dialog box. Each icon represents a different fill type. Starting from the left, we have None (for no fill at all), Solid Color, Gradient, and then Pattern. We want to fill our shape with a solid color, so click the Solid Color icon (second from the left) to select it. Then, choose black from the color swatches that appear. I'll choose it from my list of Recently Used Colors, but you can also choose it from the main swatch area. When you're done, press Enter (Win) / Return (Mac) on your keyboard to close out of the dialog box:
We also need to make sure our shape does not have a stroke applied around its edges. To do that, click on the Stroke swatch directly to the right of the Fill swatch in the Options Bar:

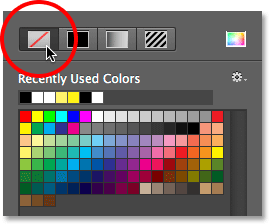
This opens the Stroke Type dialog box which looks exactly like the Fill Type dialog box, but these options apply to the stroke. Since we don't want any stroke at all, click the None icon in the upper left of the dialog box (the one with the diagonal red line through it). Press Enter (Win) / Return (Mac) when you're done to close out of it:
Step 4: Drag Out A Square Shape
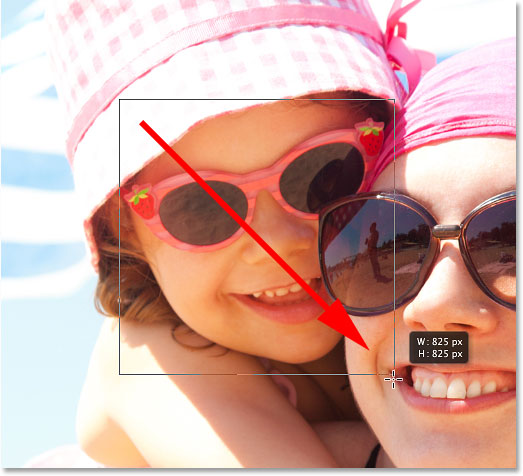
With the Rectangle Tool selected, black as the Fill color and Stroke set to None, press and hold the Shift key on your keyboard, then click and drag out your shape. Holding the Shift key down as you drag will force the shape into a perfect square, but make sure you release your mouse button before releasing the Shift key otherwise it won't work. You can also move the shape around as you're drawing it by pressing and holding the spacebar on your keyboard as you drag.
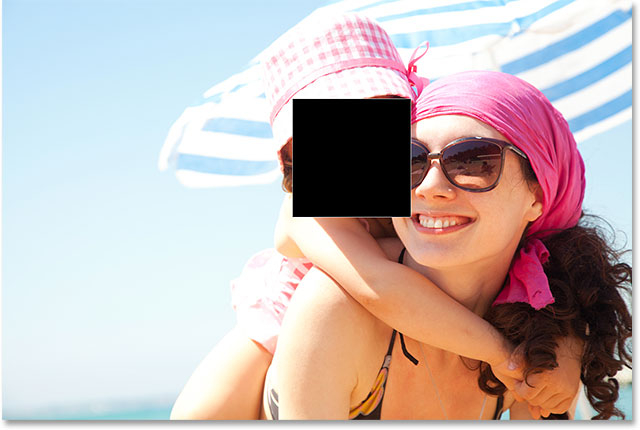
Since this shape will be used as the center area of the polaroid where the image appears, I'll drag out my shape so it's roughly large enough to fit the little girl's face inside of it. For your effect, you may want the polaroids larger or smaller, but I think this size works well for this image. Here, we see the outline of the shape as I'm drawing it:
When you release your mouse button (and then release your Shift key), that's when the shape actually appears with your chosen fill color. Here we see it temporarily blocking the girl's face from view:
Note for Photoshop CC Users: In Photoshop CC, Adobe has introduced a new Live Shapes feature, and as soon as you've drawn your shape, the Properties panel will open to the new Live Shape Properties. We won't be doing anything with these options here, so feel free to close or minimize the Properties panel. Again, this is only for Photoshop CC users. Photoshop CS6 does not offer Live Shapes.
Step 5: Duplicate The Shape Layer
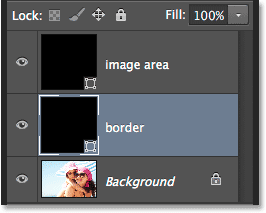
If we look in the Layers panel, we see the newly added shape layer, which Photoshop has named "Rectangle 1", sitting above the image on the Background layer:
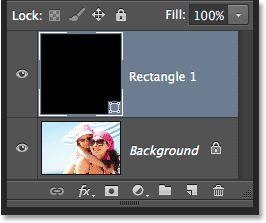
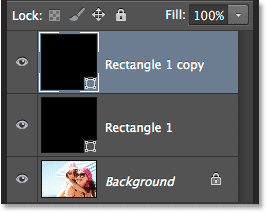
Let's make a copy of this shape, which we'll then resize to create the outer frame of the polaroid. To duplicate it, make sure the shape layer is selected (highlighted in blue) in the Layers panel. Then go up to the Layer menu in the Menu Bar along the top of the screen, choose New, then choose Shape Layer Via Copy. Or, an even faster way to duplicate the layer is to just press Ctrl+J (Win) / Command+J (Mac) on your keyboard:

Photoshop duplicates the shape layer, gives the copy the generic name "Rectangle 1 copy" and places it above the original:
Step 6: Rename The Two Shape Layers
Before we continue, let's replace those generic names that Photoshop gave our shape layers with names that are more meaningful. Beginning with Photoshop CS6, Adobe has made it much easier to rename multiple layers. We'll use the top shape layer as the inner image area of the polaroid, so highlight its current name "Rectangle 1" by double-clicking on it, then rename the layer "image area". Don't press Enter (Win) / Return (Mac) to accept it yet, just leave the name highlighted:
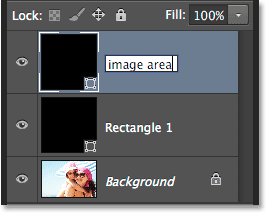
Press the Tab key on your keyboard to instantly jump down to the next layer below it and highlight its name. This layer will be used as the white border of the polaroid, so rename this second layer "border". Press Enter (Win) / Return (Mac) on your keyboard when you're done to accept the new name:
Step 7: Change The Shape Color To White
We'll need the border area of our polaroid to be white, not black, so with the "border" layer selected in the Layers panel, click once again on the Fill color swatch in the Options Bar:
This re-opens the Fill Type dialog box. Leave the type set to Solid Color and choose white from the color swatches. Press Enter (Win) / Return (Mac) when you're done. You won't see the shape change color in the document yet because the black-filled shape is sitting on top of it and blocking it from view, but we'll see it in a moment:
Step 8: Resize The Border Shape
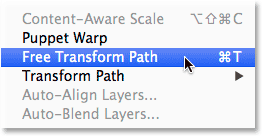
With the color of the shape now set to white, go up to the Edit menu at the top of the screen and choose Free Transform Path. Or, press Ctrl+T (Win) / Command+T (Mac) on your keyboard to select the Free Transform Path command from the keyboard:
This places transform handles (those little squares) around the shape, and we can use these handles to resize it. To create a border around the image area, we need this white shape to be slightly larger than the black shape, so press Shift+Alt (Win) / Shift+Option (Mac) on your keyboard, and with the keys still held down, click on any of the four corner handles around the shape and drag a short distance outward until you've added enough border area. As we saw earlier, holding the Shift key forces the shape into a perfect square, and adding the Alt (Win) / Option (Mac) key along with it allows us to resize the shape from its center rather than from the corner. Again, remember to release your mouse button first when you're done, then release the keys:
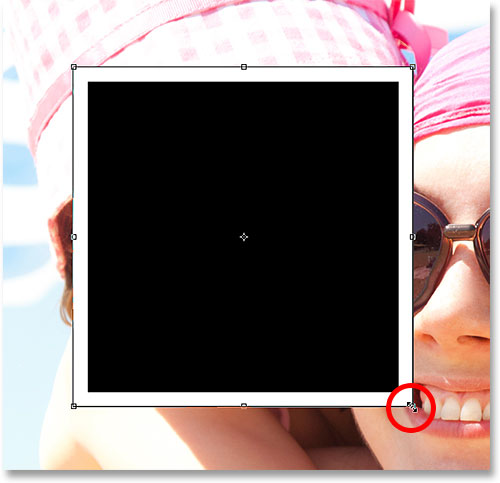
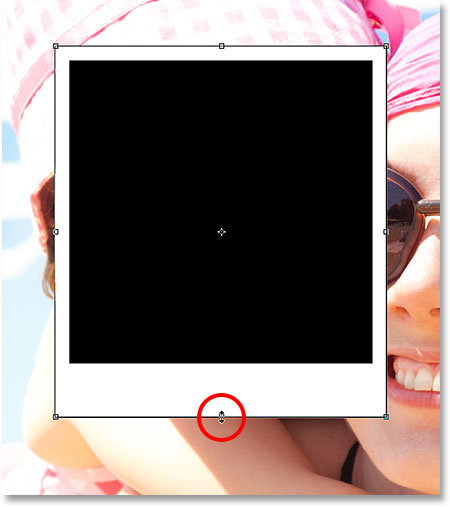
Polaroids have some extra border area along the bottom, so click on the bottom handle and drag it downward to add some additional space. No need to add any keys from the keyboard this time. When you're done resizing the shape, press Enter (Win) / Return (Mac) on your keyboard to accept it and exit out of transform mode:
Step 9: Add A Drop Shadow To The Border
To give our polaroid collage a bit of depth, let's add a drop shadow to the border. Click on the Layer Styles icon (the "fx" icon) at the bottom of the Layers panel:
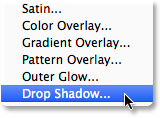
Choose Drop Shadow from the bottom of the list that appears:
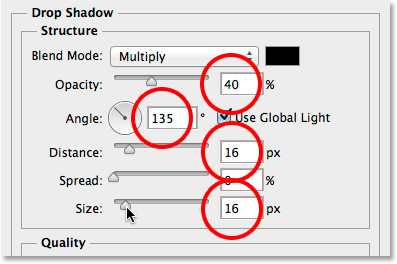
This opens the Layer Style dialog box set to the Drop Shadow options in the middle column. Lower the Opacity of the shadow to around 40% so it will appear more subtle, then change the Angle to 135° so the light source will be in the upper left. Finally, increase the Distance and Size options a little bit to control how far the shadow extends outward from behind the polaroid and how soft it appears. In my case, I'll set both my Distance and Size values to around 16px, but you may need smaller or larger values depending on the size of your image. When you're done, click OK to close out of the Layer Style dialog box:
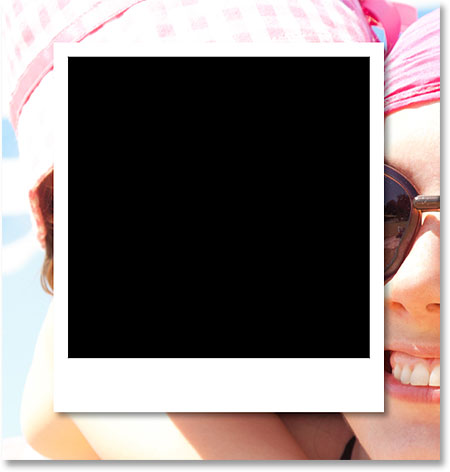
Here's my polaroid with the drop shadow applied:
Step 10: Select The Image Area Layer
Click on the "image area" shape layer in the Layers panel to select it:
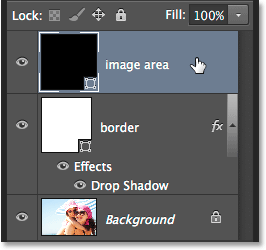
Step 11: Open The Blending Options
We've drawn our polaroid, but now we need a way to reveal our image inside the black-filled shape in the center of it. We can do that using the Knockout feature in Photoshop's Blending Options. One way to get to the Blending Options is to click on the small menu icon in the top right corner of the Layers panel:
Then choose Blending Options from the menu that appears:
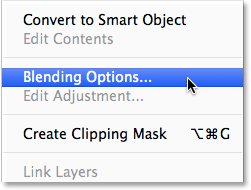
Photoshop once again opens the Layer Style dialog box, this time set to the main Blending Options. In the Advanced Blending section in the center, change the Knockout option from None to Deep:
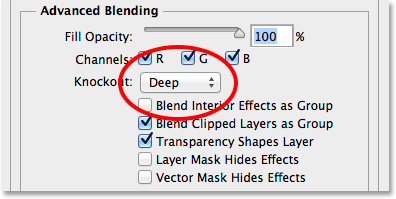
This will essentially turn our black shape into a hole that lets us see right through to the image on the Background layer! Or at least, it will in a moment. For it to work, we also need to lower the Fill Opacity all the way down to 0%. You'll find the Fill Opacity option just above the Knockout option:
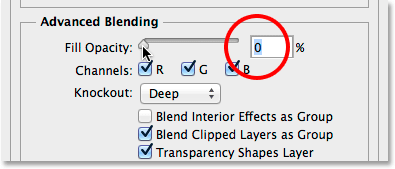
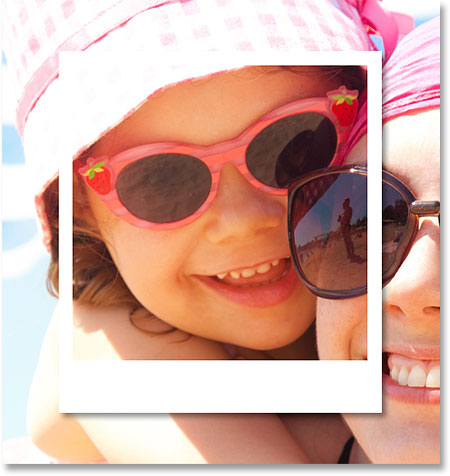
Click OK to close out of the Layer Style dialog box. With Fill Opacity set to 0%, our image is now fully visible inside the image area of the polaroid:
Step 12: Select Both Shape Layers
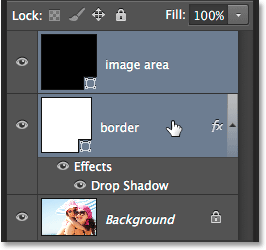
To create our collage, we'll be making copies of this initial polaroid, so let's make things easier by placing both of our shape layers into a layer group. To do that, we first need to have both shape layers selected. Currently, the top "image area" layer is selected in the Layers panel. Hold down the Shift key on your keyboard and click on the "border" layer below it to select both layers at once:
Step 13: Group The Layers
With both layers selected, click once again on the menu icon in the top right corner of the Layers panel:
Choose New Group from Layers from the menu:
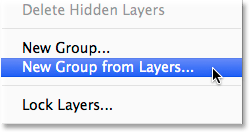
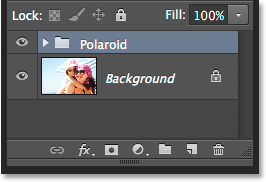
Photoshop will pop open the New Group From Layers dialog box where we can name the group before it's added. I'll name mine "Polaroid". Click OK when you're done to close out of the dialog box:

The new layer group appears above the Background layer in the Layers panel:
Step 14: Select The Background Layer
Before we start adding more polaroids to the collage, let's first hide the main photo on the Background layer. We'll use one of Photoshop's Solid Color fill layers as the background for our collage. Click on the Background layer to select it:
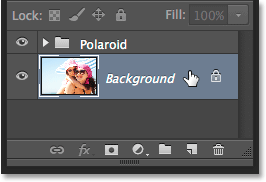
Step 15: Add A Solid Color Fill Layer
With the Background layer selected, click on the New Fill or Adjustment Layer icon at the bottom of the Layers panel:
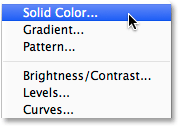
Choose Solid Color from the top of the list that appears:
This opens the Color Picker where we choose which color we want to fill the layer with. You can use any color you like, but I'm going to go with black for now. Later on, we'll see how we can easily come back and change the color to something different:
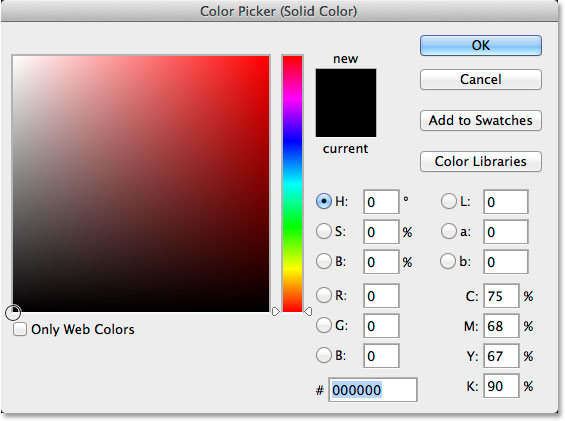
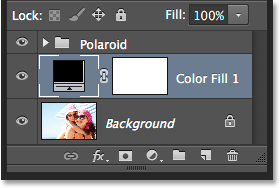
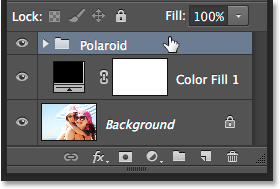
Click OK when you're done to close out of the Color Picker. We can see the new Solid Color fill layer (named "Color Fill 1") sitting between the "Polaroid" layer group and the Background layer in the Layers panel:
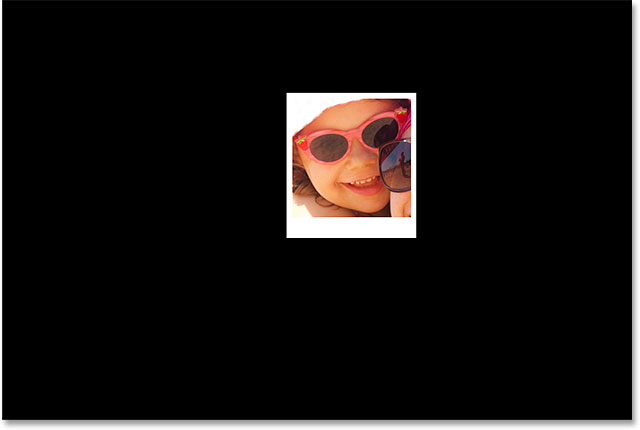
And in the document itself, we see that our polaroid is now sitting in front of a solid-colored background. The only part of our main image that's still visible is the area inside the polaroid:
Step 16: Select The Layer Group
Let's quickly rotate our polaroid to give it a bit more visual interest. Click on the "Polaroid" layer group in the Layers panel to select it:
Step 17: Rotate The Polaroid With Free Transform
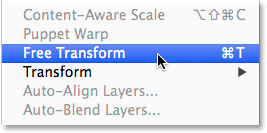
With the layer group selected, go up to the Edit menu at the top of the screen and choose Free Transform. Or, press Ctrl+T (Win) / Command+T (Mac) to select Free Transform with the keyboard shortcut:
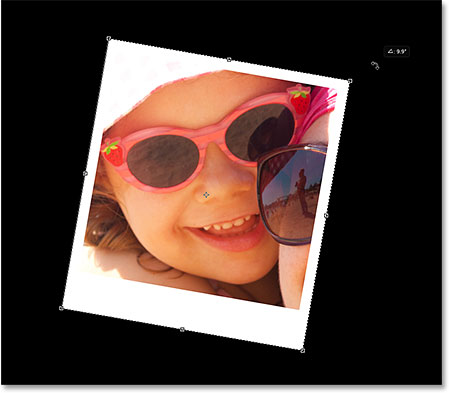
Then, move your cursor anywhere outside of the Free Transform box. When you see your cursor change into a curved, double-sided arrow, click and drag with your mouse to rotate the polaroid. When you're done, press Enter (Win) / Return (Mac) to accept the rotation and exit out of Free Transform:
Step 18: Copy, Move And Rotate More Polaroids
At this point, all of the hard work is done. Creating the rest of the collage is simply a matter of duplicating the layer group to make a new polaroid, using Free Transform to move and rotate it into position, and then repeating the same steps over and over. To speed things up, rather than wasting time selecting commands from the Menu Bar at the top of the screen, I suggest using the faster keyboard shortcuts. I'll go through the steps here once, and then as I said, it's just a matter of repeating them until your collage is finished.
First, to add a new polaroid, press Ctrl+J (Win) / Command+J (Mac) on your keyboard. This will duplicate the one you added previously. It won't look like anything new has been added in the document, but that's because the new polaroid is sitting directly on top of the previous one. The Layers panel, however, will show that a copy of the polaroid has been added:
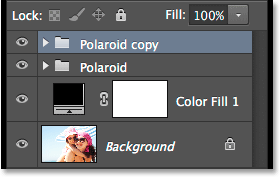
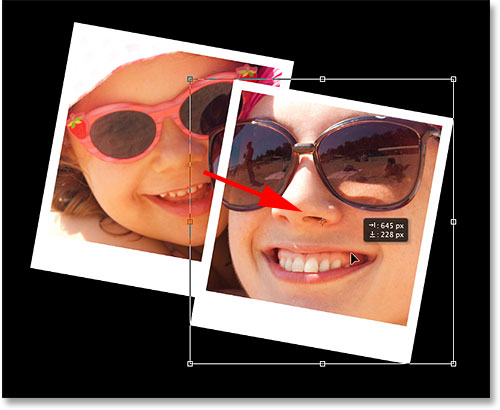
Then, to move the new polaroid into position and rotate it, select Free Transform by pressing Ctrl+T (win) / Command+T (Mac). To move the polaroid and reveal more of your image, click anywhere inside the Free Transform box and drag it with your mouse:
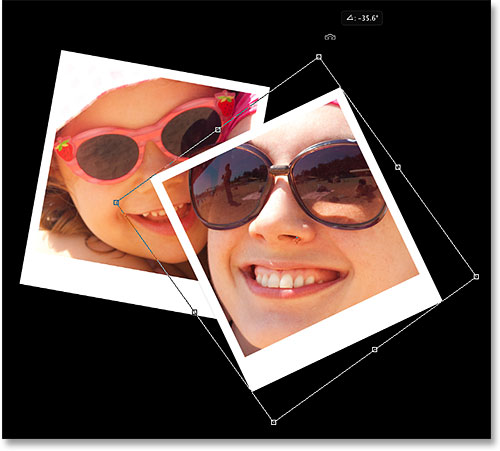
Rotate the polaroid just as we did before by clicking and dragging anywhere outside of the Free Transform box. When you're done, press Enter (Win) / Return (Mac) to accept it. Or, you can also accept it and exit out of Free Transform simply by double-clicking anywhere inside the Free Transform box:
Continue adding more polaroids to your collage, moving them and rotating them into position following the same steps, pressing Ctrl+J (Win) / Command+J (Mac) to duplicate the previous polaroid, then Ctrl+T (Win) / Command+T (Mac) to move and rotate the new one with Free Transform just as we did above. Press Enter (Win) / Return (Mac) on your keyboard or double-click inside the Free Transform box to accept it. Here's what my collage looks like. Notice how I arranged the polaroids to focus on the main subject of the photo without worrying too much about the rest of the image:

Step 19: Change The Background Color (Optional)
Earlier, we chose black as the background color for our collage, but if you get to this point and decide that black is just too dark, it's easy to change the color. Double-click on the color swatch for the Solid Color fill layer in the Layers panel:
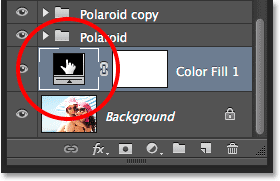
This will re-open the Color Picker. You can choose a different color from the Color Picker itself, or you can sample a color directly from the image. To sample a color, move your mouse cursor away from the Color Picker and over the image. You'll see your cursor change into an eyedropper. Move the eyedropper over the color you want to use for the background, then click on the color to sample it. Here, I'm clicking on an area of light blueish gray in one of the polaroids:
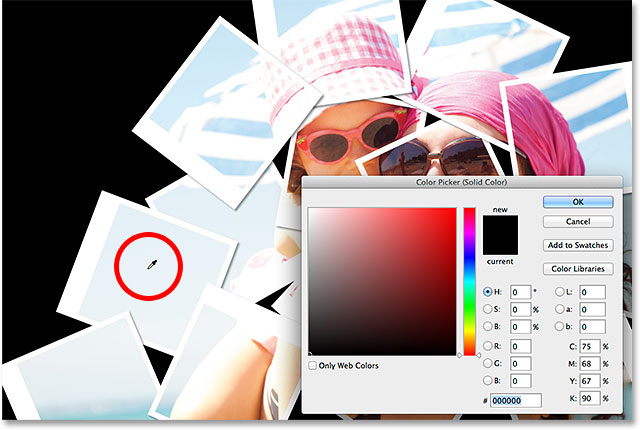
With the color sampled, click OK to close out of the Color Picker. Photoshop instantly updates the collage with your new background color:

 Tags :- Photoshop 8 , Photoshop 7 trick , trick for Photoshop CS6 , photoshop PNG , Png Images , image png , png , transparent images , transparent png , psd , psd image , png free , download png , png for free , png blogspot , png photoshop , photoshop png images , images for photoshop , cs5 trick , photoshop tricks , photoshop tricks , photoshop background , photoshop psd , photoshop cs5, photoshop cs5 trick,


No comments:
Post a Comment